Extra
This section contains extra config settings that pertain to both Standalone or With extension.
Use non-character keys
This section describes a way to use non-character keys in which-key menu like <tab> or Control+D.
<tab> is supported out of the box. Follow the following instruction to add support for keys other than <tab>.
Merge the following json to your keybindings.json.
{
  "key": "ctrl+x",
  "command": "whichkey.triggerKey",
  "args": "C-x",
  "when": "whichkeyVisible"
}
Once you've done that, you can use C-x in the key value of the which-key config.
Effectively, the above keybinding will enter C-x in the QuickPick input box when ctrl+x is pressed when the which key is focused.
Display menu with a delay
You can set whichkey.delay in settings.json to a value in milliseconds to delay the display of the menu.
Display menu items alphabetically
You can set whichkey.sortOrder in settings.json to alphabetically to always display the menu items alphabetically.
Bind shortcuts to submenu
To open a submenu with a shortcut, one can execute a whichkey.triggerKey command right after whichkey.show.
Here's an example keybindings.json using runCommands:
{
    "key": "alt+s",
    "command": "runCommands",
    "args": {
        "commands": [
            "whichkey.show",
            { "command": "whichkey.triggerKey", "args": "s" },
        ]
    }
}
Unclear selection
Selected text can be hard to see when the which-key menu is active due to your current theme's inactiveSelectionBackground config.
You can selectively override that color in your settings.json like the following example.
"workbench.colorCustomizations": {
    "editor.inactiveSelectionBackground": "color that works better",
},
Style the menu with Customize UI
VS Code unfortunately only allows for very limited styling of the QuickPick used by which-key to display keys.
However, using the Customize UI extension,
the style sheet of the VS Code installation can be modified to result in a nicer appearance and better usability.
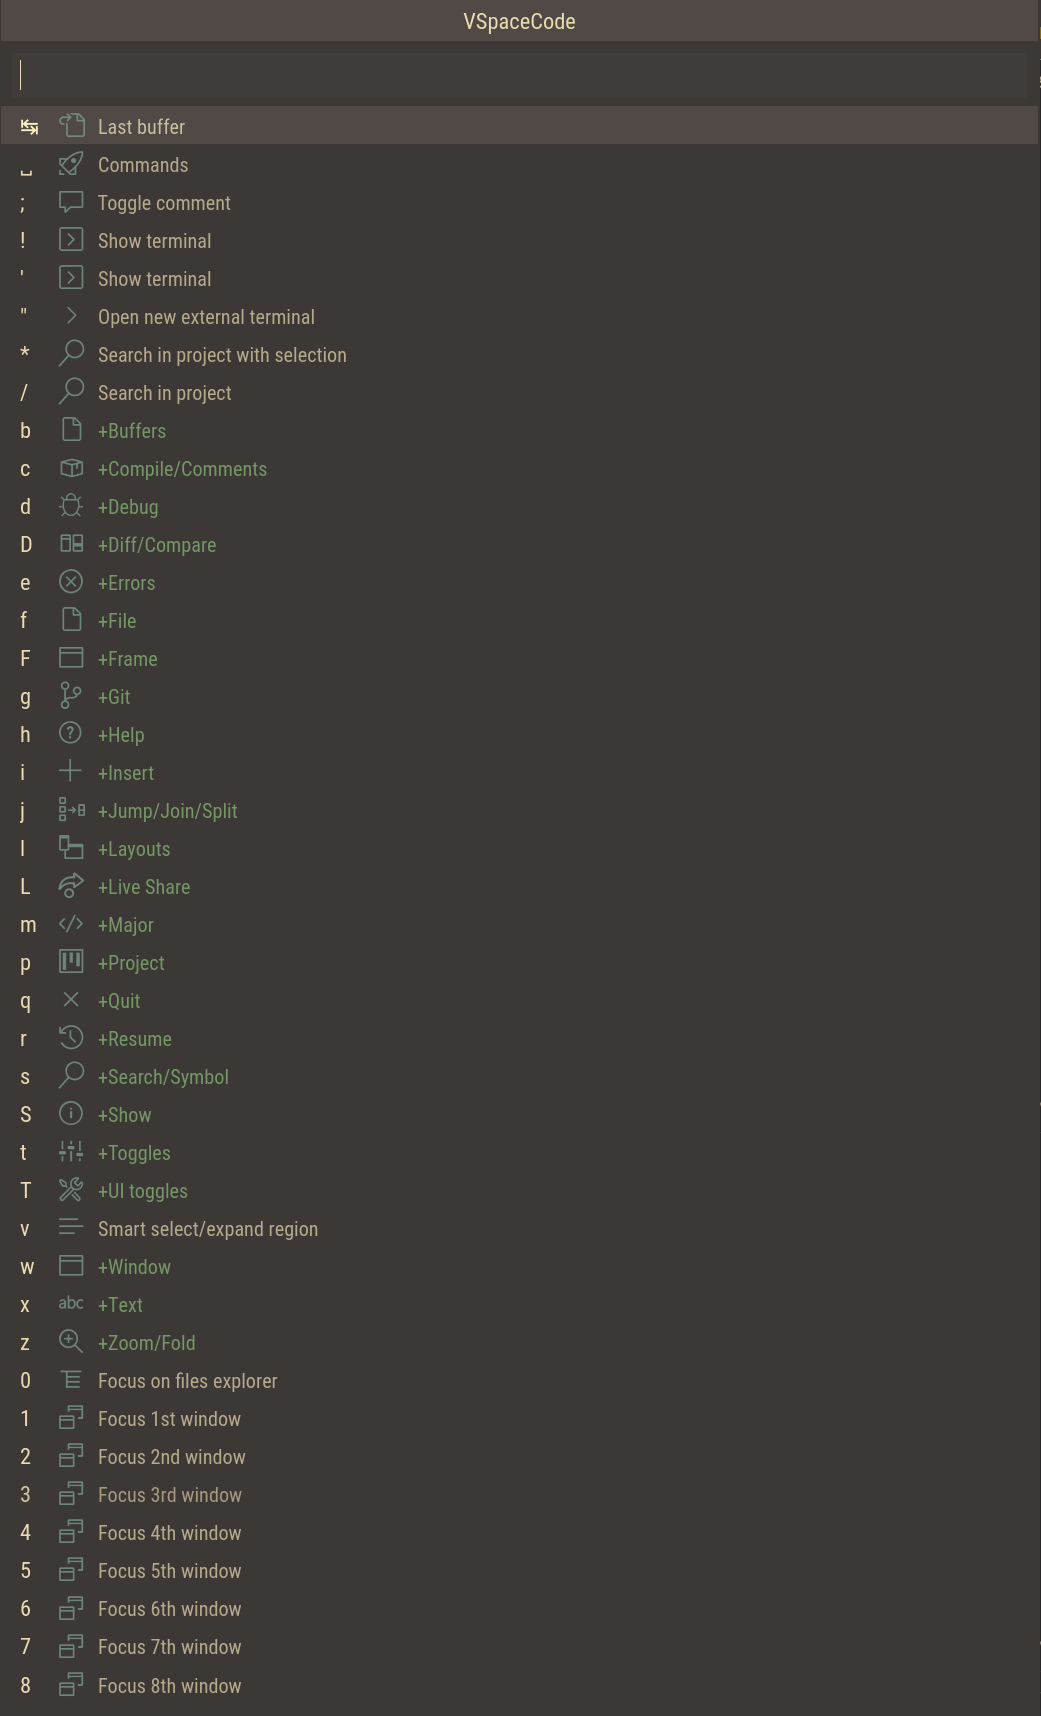
Suggested settings:
"customizeUI.stylesheet": {
    // Let the quick pick take the full window height, so that more bindings
    // are visible.
    ".quick-input-widget > .quick-input-list > .monaco-list":
        "max-height: 100vh !important;",
    // Colorize icons uniformly and add some extra padding
    ".quick-input-widget > .quick-input-list .codicon":
        "color: #83a598 !important; padding-right: 5px;",
    // Colorize entries starting with a `+` differently
    ".quick-input-widget > .quick-input-list .monaco-list-row[aria-label*=\" +\"] .label-description":
        "color: #8ec07c;",
}
Those will result in something similar to the following:
In theory, it'd also be possible to achieve a multi-column display using those rules. However, those result in other Quick Pick dialogs being broken. See the relevant issue for details.
Conditional bindings (experimental)
caution
This feature is marked as experimental, and the config is subject to change.
This allows the conditional execution of bindings.
Currently, it only supports conditions on the when passed from a shortcut and languageId of the active editor.
- It reuses a structure similar to the
bindingstype. - The property
keyin a binding item is reused to represent the condition. - The condition can be thought of as a key-value pair serialized into a string.
languageId:javascript;when:sideBarVisible is an example condition serialized into a string for the key
that checks if the language id of the currently active editor is javascript and if the side bar is visible
(see the when section for more details).
A concrete example of a binding with that condition is as follows:
{
  "whichkey.bindings": [
    {
      "key": "m",
      "name": "Major...",
      "type": "conditional",
      "bindings": [
        {
          "key": "languageId:javascript;when:sideBarVisible",
          "name": "Open file",
          "type": "command",
          "command": "workbench.action.files.openFileFolder"
        },
        {
          "key": "",
          "name": "Buffers",
          "type": "bindings",
          "bindings": [
            {
              "key": "b",
              "name": "Show all buffers/editors",
              "type": "command",
              "command": "workbench.action.showAllEditors"
            }
          ]
        },
      ]
    }
  ]
}
In this example, when m is pressed, it will find the first binding that matches the current condition.
If no configured key matches the current condition, a default item showing a buffer menu will be used.
Any item that has an invalid key will be used as the default item.
Therefore, in this example, if the language is javascript and the side bar is visible, m will open
the file browser, otherwise it will show the "buffers" menu.
Overrides
This reuses a structure similar to the bindings type.
For example, the following config will override the m binding completely:
{
  "whichkey.bindingOverrides": [
    {
      "keys": "m",
      "name": "Major",
      "type": "conditional",
      "bindings": [
        {
          "key": "languageId:javascript",
          "name": "Go to",
          "type": "command",
          "command": "workbench.action.gotoLine",
        }
      ]
    }
  ]
}
You can also choose to add or remove conditions to existing conditional bindings.
For example, the following will add a key of languageId:javascript to the conditional binding if languageId:javascript doesn't already exist.
{
  "whichkey.bindingOverrides": [
    {
      "keys": ["m", "languageId:javascript"],
      "name": "Go to",
      "type": "command",
      "command": "workbench.action.gotoLine",
    }
  ]
}
A negative position property can also be used to remove conditional bindings.
when
Since VSCode doesn't allow reading of the context of a json field, we cannot read the condition used in the when in shortcuts.
For this reason, you will need to repeat every when condition used in conditional bindings, at least until
vscode/#10471 is implemented.
For example, the following shortcut in keybindings.json will pass both key and when in the args to which-key.
The outer when is the condition clause
for vscode to execute this key, and must contain whichKeyVisible which limits this shortcut to be only applicable when the which-key menu is visible.
In this case, if a user presses key t when which-key, side bar, and explorer viewlet are visible, it will execute whichkey.triggerKey
command and send the args (key and when) to which-key
{
  "key": "t",
  "command": "whichkey.triggerKey",
  "args": {
    "key": "t",
    "when": "sideBarVisible && explorerViewletVisible"
  },
  "when": "whichkeyVisible && sideBarVisible && explorerViewletVisible"
}
The args.key and args.when that were sent to which-key are then used to find a binding that matches the key t
and any conditional binding that matches that condition. The following binding is an example that contains a conditional binding that matches the args.
{
  "key": "t",
  "name": "Show tree/explorer view",
  "type": "conditional",
  "bindings": [
    {
      "key": "",
      "name": "default",
      "type": "command",
      "command": "workbench.view.explorer"
    },
    {
      "key": "when:sideBarVisible && explorerViewletVisible",
      "name": "Hide explorer",
      "type": "command",
      "command": "workbench.action.toggleSidebarVisibility"
    }
  ]
}
Unfortunately, if you have another condition binding with a different key that want to match the same
when condition as the t in the above example, you will need to set up another shortcut with that different key.
languageId
This is the language id of the active editor. The language id can be found in language selection menu inside the parenthesis next to the language name.